

Use for the first switch from stock firmware or when recovering a miner.
Install Antminer firmware step by step
A beginner-friendly guide from identifying your miner to verifying a successful installation. Read the steps once before you start.
Choose your route
Install, update or recover?
The package type depends on what is currently running on the miner. Pick the route before downloading.
Use only when the miner already runs ASIC Miner Group firmware.
Use the official Toolkit for supported discovery, monitoring and bulk operations. Confirm firmware compatibility before flashing.
Choose Toolkit version →Complete the steps in this order
Do not skip hardware identification. The correct model, controller and storage are more important than choosing the newest version.
-
1
Identify the miner, controller and storage
Find the exact model on the miner label or its current web interface. In the firmware or system information screen, note the control board family and whether the package target is SD card or NAND.
- Write down the full model name, not only the S19/T19 family.
- Check the controller: Amlogic, BeagleBone, CVitek or Xilinx.
- Check the storage target: SD card or NAND.
If you are unsure: leave the uncertain filter blank and ask support before flashing. Do not guess the controller. -
2
Find and download the matching package
Open the firmware finder, choose the model first, then narrow the results by controller and storage. Download an install or update package according to your route above.
- Confirm every hardware label shown beside the package.
- Save the package without renaming or unpacking it unless the package notes explicitly say otherwise.
- Keep the matching rollback or recovery file in a safe folder.
-
3
Prepare the miner and your network
Use a stable local network connection and stable power. Open the current miner interface in a browser, record pool and network settings, and close any other update process.
- Do not flash during unstable power or a planned site restart.
- Record pool URLs, worker names and network settings.
- Keep the browser open on the miner and do not refresh repeatedly.
-
4
Install the firmware
Use HashCore Toolkit only when it confirms support for the detected firmware and operation. Otherwise open the Firmware/Upgrade area in the miner interface (the exact menu name differs by controller). Select the package, start the update and wait for the complete reboot cycle.
- Select the matching package.
- Start the install or update once.
- Do not disconnect power or network while progress is active.
- Wait for the miner to reboot and become reachable again.
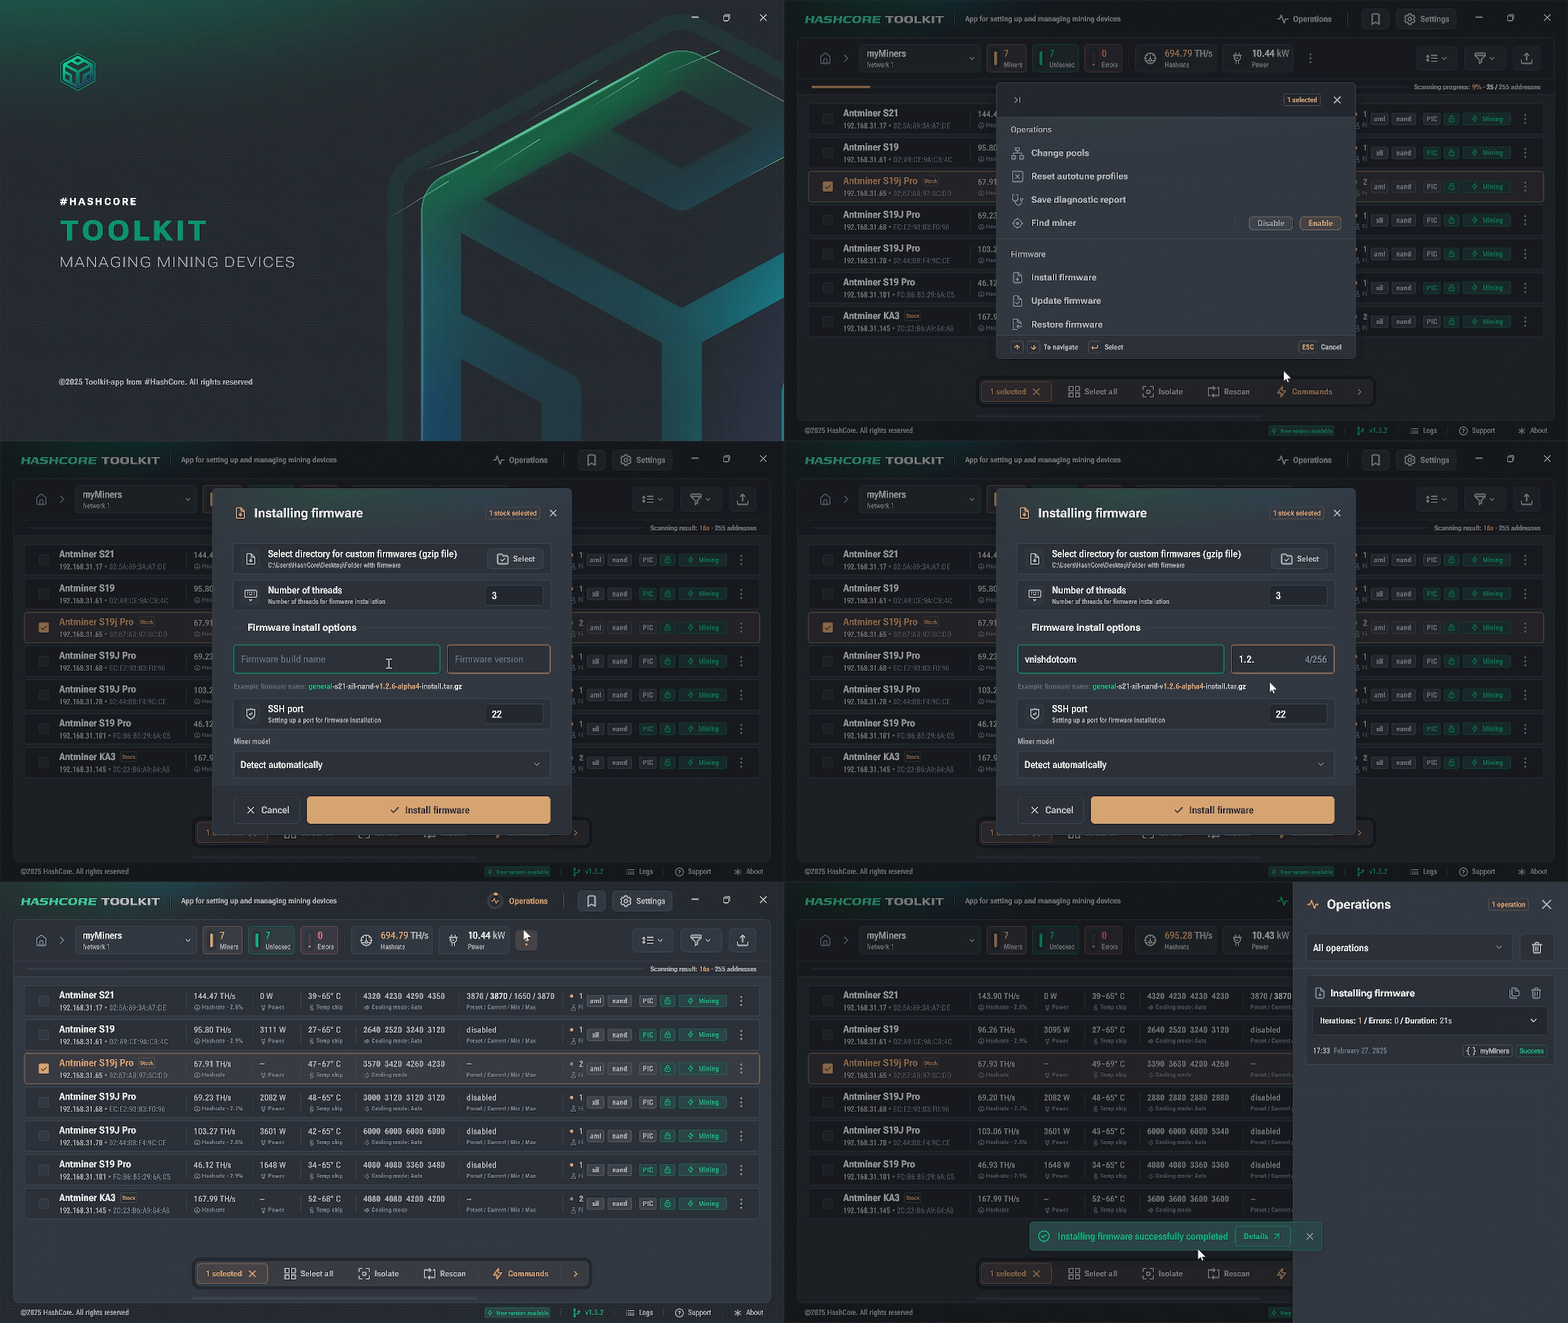
Firmware installation process in HashCore Toolkit Important: a temporary loss of the web interface during reboot is normal. Do not power-cycle the miner just because the page is unavailable. -
5
Verify before tuning
Log back in after the reboot and confirm that the firmware version changed and the miner is stable. Only then choose an operating profile or start autotuning.
- All hashboards are detected.
- Temperatures and fans look normal.
- Pools and worker names are correct.
- The profile matches your power budget.
Let the miner run at a conservative profile first. Watch temperatures, fans and hardware errors before increasing performance.
Common mistakes to avoid
- Flashing a build for the wrong control board.
- Mixing up SD and NAND packages.
- Cutting power mid-flash.
- Pushing aggressive tuning before the miner is stable.
Installation FAQ
How long does installation take?
For a single miner, usually under 15 minutes — download the package, flash it, and wait for the boot cycle to finish.
What if the installation fails?
Do not panic and do not cut power. Message our team on Telegram — we will help you re-flash or recover the miner step by step.
Install or update — which do I need?
Use install for a first-time switch from stock firmware or recovery. Use update if the miner already runs our firmware and only needs a newer version.
Can you install it for me?
Yes. Reach out on Telegram and our specialists can guide you remotely or handle larger fleet rollouts with you.
Installation complete
Open post-installation guides →Next: connect the miner and tune safely
Configure a primary and backup pool first, then select a conservative performance profile.